User Guide
CHAPTER 1Welcome
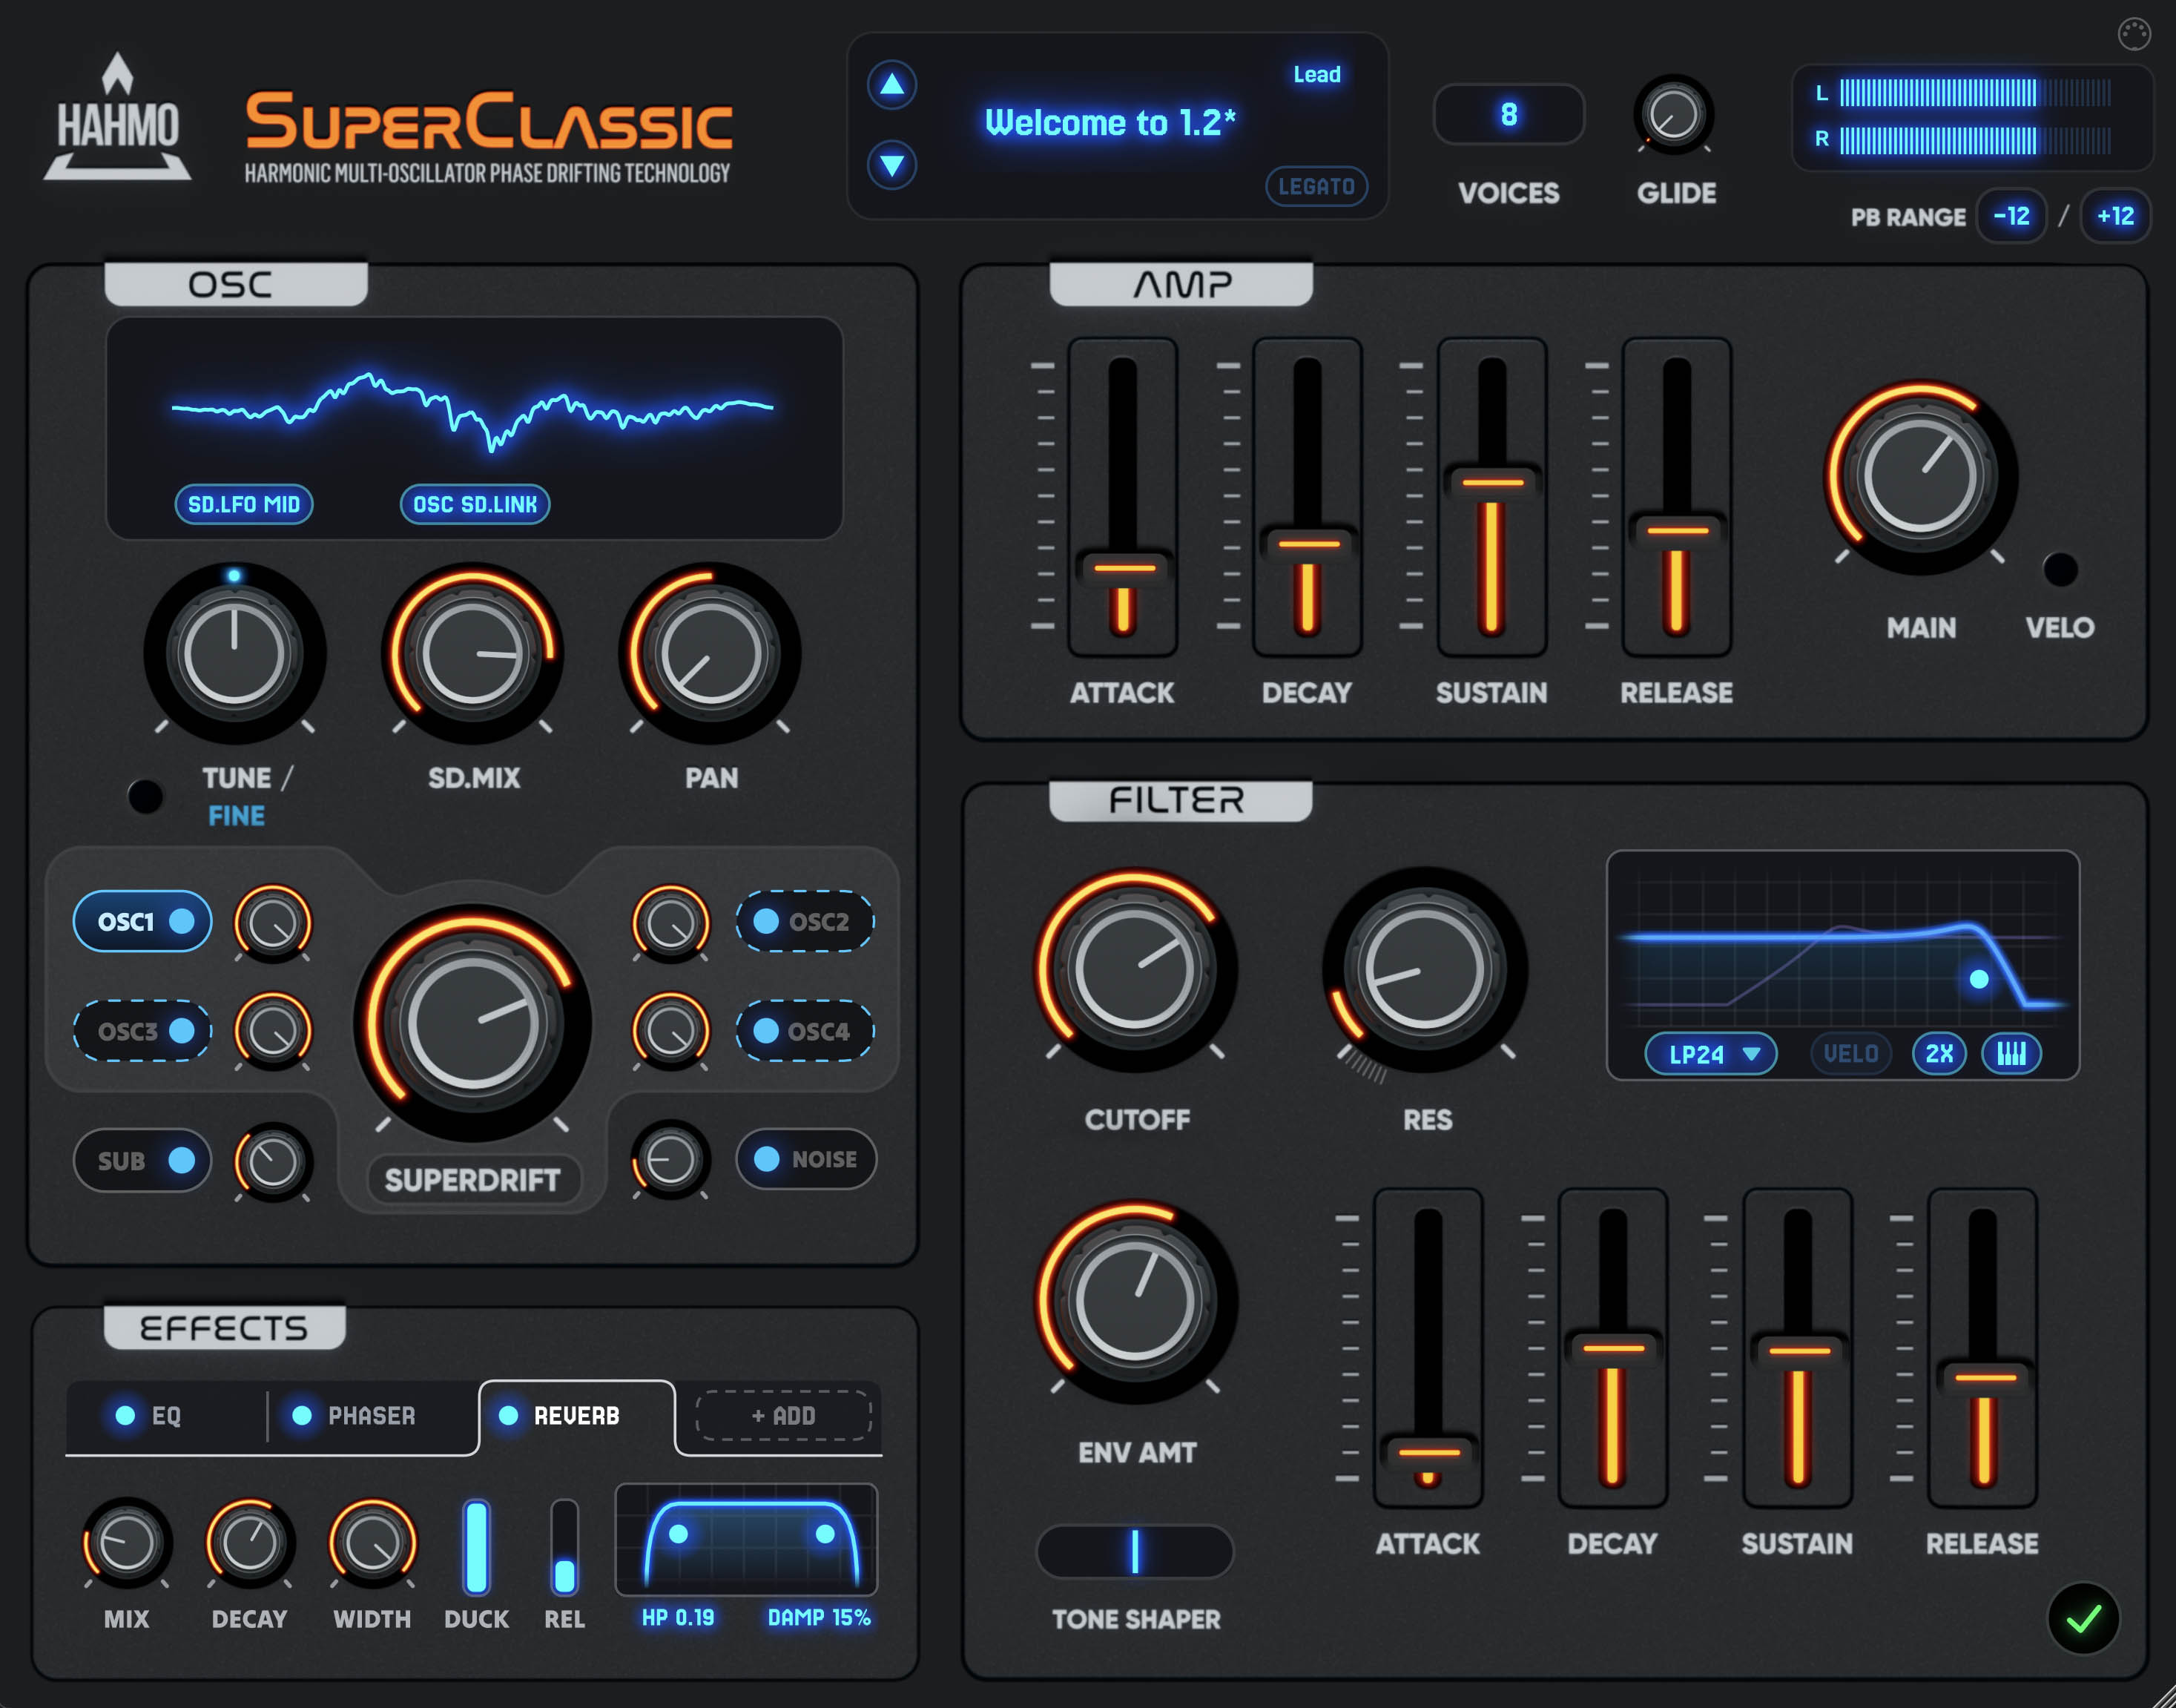
About SuperClassic
Thank you for choosing SuperClassic!
SuperClassic is a focused but powerful synthesizer built around one of the most beloved sounds in electronic music: the supersaw. First heard on the legendary Roland JP-8000, the supersaw became the cornerstone of trance and progressive house in the late '90s, and its lush, wide character shaped an entire era of dance music.
SuperClassic recaptures that sound with modern fidelity. It lets you stack up to four supersaw oscillators — each one made of seven high-quality, band-limited saw waves — for huge, larger-than-life stereo leads and pads. The proprietary SuperDrift™ engine gives every oscillator its own independent motion, producing the non-repeating, analog-style width and warmth that is SuperClassic's signature.
Version 1.2 adds a four-slot effects rack, dedicated sub and noise oscillators, a live filter visualizer, a three-band EQ, MIDI Learn, and a refreshed look — while using less CPU than before.
Getting in Touch
For support, downloads, and your license details, visit hahmodsp.com and the client portal. We're always happy to hear from you — whether it's a question, a bug report, or a track you made with SuperClassic.
System Requirements
| Platform | Requirement |
|---|---|
| PC | Windows 10 or later (64-bit), VST3 host |
| Mac | macOS 10.14 Mojave or later (Intel & Apple Silicon), VST3 or Audio Unit host |
| Host | Any 64-bit VST3 or Audio Unit compatible audio host (DAW) |
SuperClassic is highly optimized and runs smoothly on modern systems. CPU usage scales with polyphony and the number of active oscillators — see Voicing and Glide for tips on keeping projects efficient.
Installing SuperClassic
If you own a license, download the installer for your platform from the client portal at hahmodsp.com. Just want to try SuperClassic first? You can download the free demo from hahmodsp.com instead — see Using Demo Mode for what it includes. Run the installer and follow the on-screen instructions — the plug-in is placed in your system's standard plug-in locations automatically.
- Windows: VST3, installed to the system VST3 folder.
- macOS: VST3 and Audio Unit (Intel & Apple Silicon universal), installed to the system plug-in folders.
After installing, restart your DAW (or rescan plug-ins) so the host picks up SuperClassic.
Activating SuperClassic
The first time you open SuperClassic, a welcome dialog appears where you can enter your license key or start the demo.

To try SuperClassic for free, click Demo in the welcome dialog — see Using Demo Mode for what the demo includes.
To activate SuperClassic:
- Open SuperClassic in your DAW and click Activate in the welcome dialog.
- Enter your email address and the license key you received when purchasing.
- Click OK. SuperClassic contacts the license server and confirms your key.
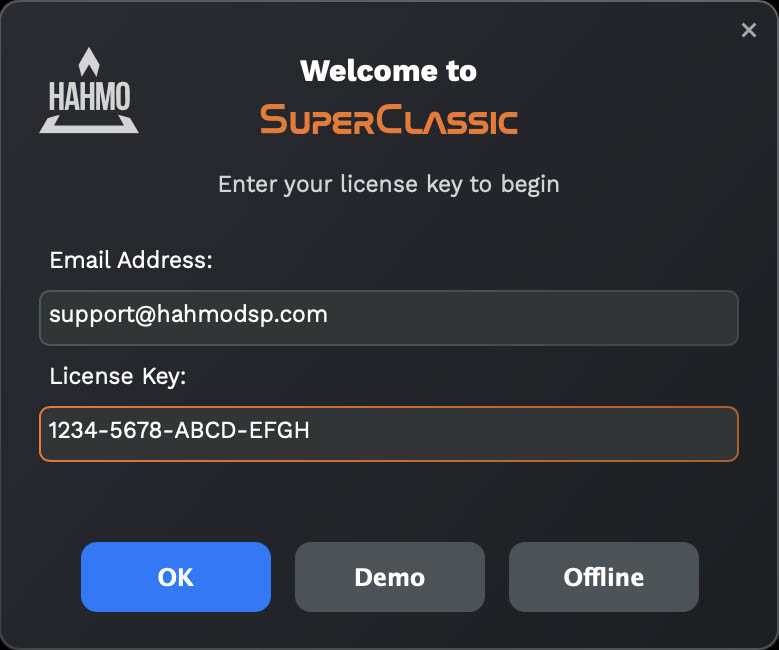
Once activated, a license status icon in the interface confirms your copy is registered. Clicking it shows your license details.
Offline Activation
If your music computer is not connected to the internet, you can activate offline:
- Choose the offline activation option in the license dialog. SuperClassic generates a challenge file and asks you to save it.
- Transfer the challenge file to a computer with internet access and upload it in the client portal to receive a response file.
- Back on your music computer, import the response file in the license dialog. SuperClassic is now activated.
Deactivating a Machine
If you're moving to a new computer, you can deactivate SuperClassic from the license status dialog. This frees the activation so it can be used on the new machine. If the license server can't be reached, SuperClassic offers a local deactivation instead.
Using Demo Mode
Want to try before you buy? SuperClassic includes a full-featured demo mode with the following limitations:
- The demo runs for 15 minutes per session. When time runs out, audio is muted until you restart your DAW session.
- Saving presets is disabled, and plug-in state is not restored when reopening a project.
Everything else — every oscillator, filter, and effect — is fully functional, so you can properly explore the sound.
CHAPTER 2Getting Started
Adding SuperClassic to a Track
SuperClassic is an instrument plug-in, so you add it to an instrument track like any other synth. For example, in Ableton Live, drag SuperClassic from the browser onto a MIDI track. In Logic Pro, choose it as the instrument on a software instrument channel strip. Play a note — the default sound is a classic supersaw, ready to go.
Exploring the Interface
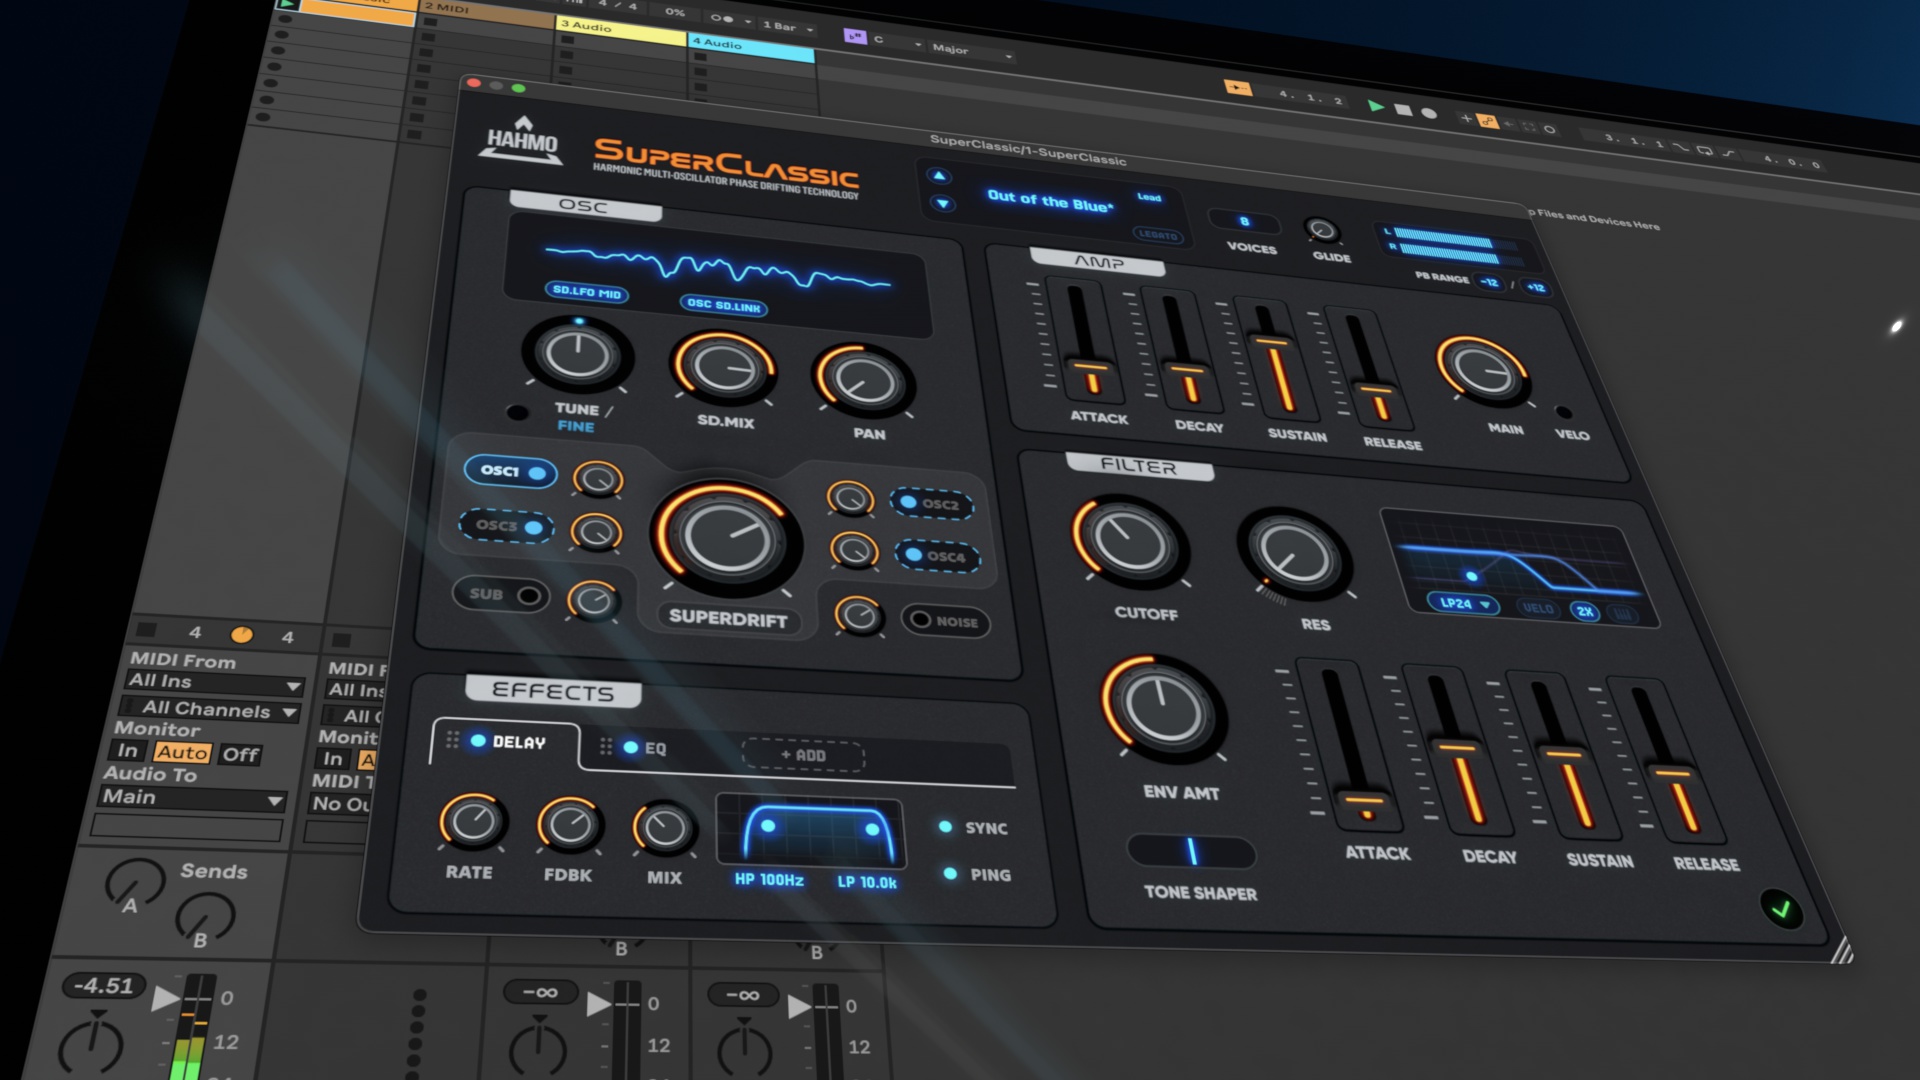
SuperClassic's interface is designed to keep sound design fast and hands-on: the synth voice — oscillators, filter, and envelopes — is laid out on a single screen, and the effects rack sits alongside it, showing the controls for whichever effect slot you select. The numbers below mark the main areas:
1
2
3
3
4
5
6
6
| Area | What it does |
|---|---|
| 1Oscillators | The four SuperClassic parts with their tuning, level, pan, and SuperDrift™ controls, plus the noise and sub oscillators. |
| 2Filter | The classic virtual-analog filter with its live response visualizer, cutoff, resonance, and key tracking. |
| 3Envelopes | ADSR envelopes for the amplifier and the filter. |
| 4Effects rack | Four slots you can fill with Delay, Reverb, Chorus, Phaser, Drive, or EQ — in any order. |
| 5Center display | An oscilloscope showing the output waveform. While you adjust a control, it switches to a large value readout. |
| 6Master | Main volume, output meters, voicing controls, and the preset browser. |
Exploring Basic Operations
Using Knobs and Sliders
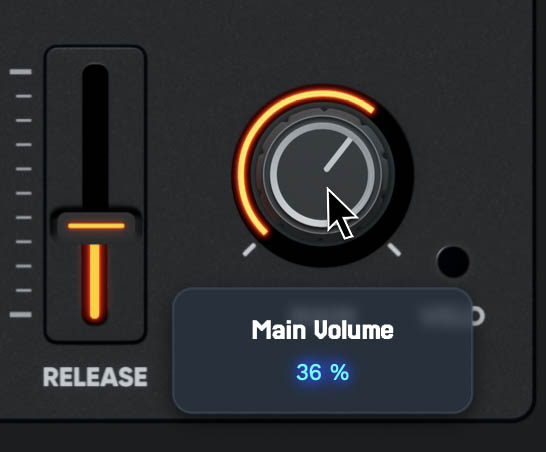
Click and drag any knob or slider to adjust it. While you drag, the center display shows the parameter's exact value in large type, and a tooltip near the control shows its name and value — so you always know what you're setting, and to what.
Double-click a knob to reset it. Synth controls return to their default values, while effect knobs snap to their neutral point — a mix knob to fully dry, a bipolar knob like Drive's TONE to its center — so a double-click always takes the effect out of the equation rather than dialing some arbitrary amount back in.
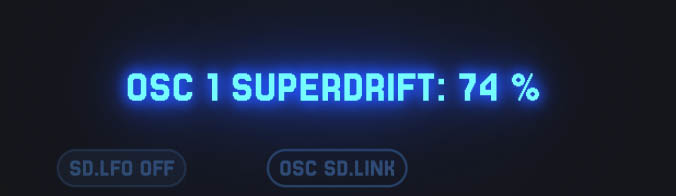
The Center Display
When you're not touching anything, the center display runs a live oscilloscope of SuperClassic's output — a great way to see what SuperDrift and the filter are doing to the waveform. On the opposite side of the interface, the stereo output meters show your level on both channels; they turn red when you're running hot.
Resizing the UI
Drag the bottom-right corner of the plug-in window to resize SuperClassic to your liking. The interface scales smoothly to any size, and the window keeps its size when you close and reopen the editor during a session.
Working with Presets
The preset name is shown at the top of the interface. Click it to open the preset menu.
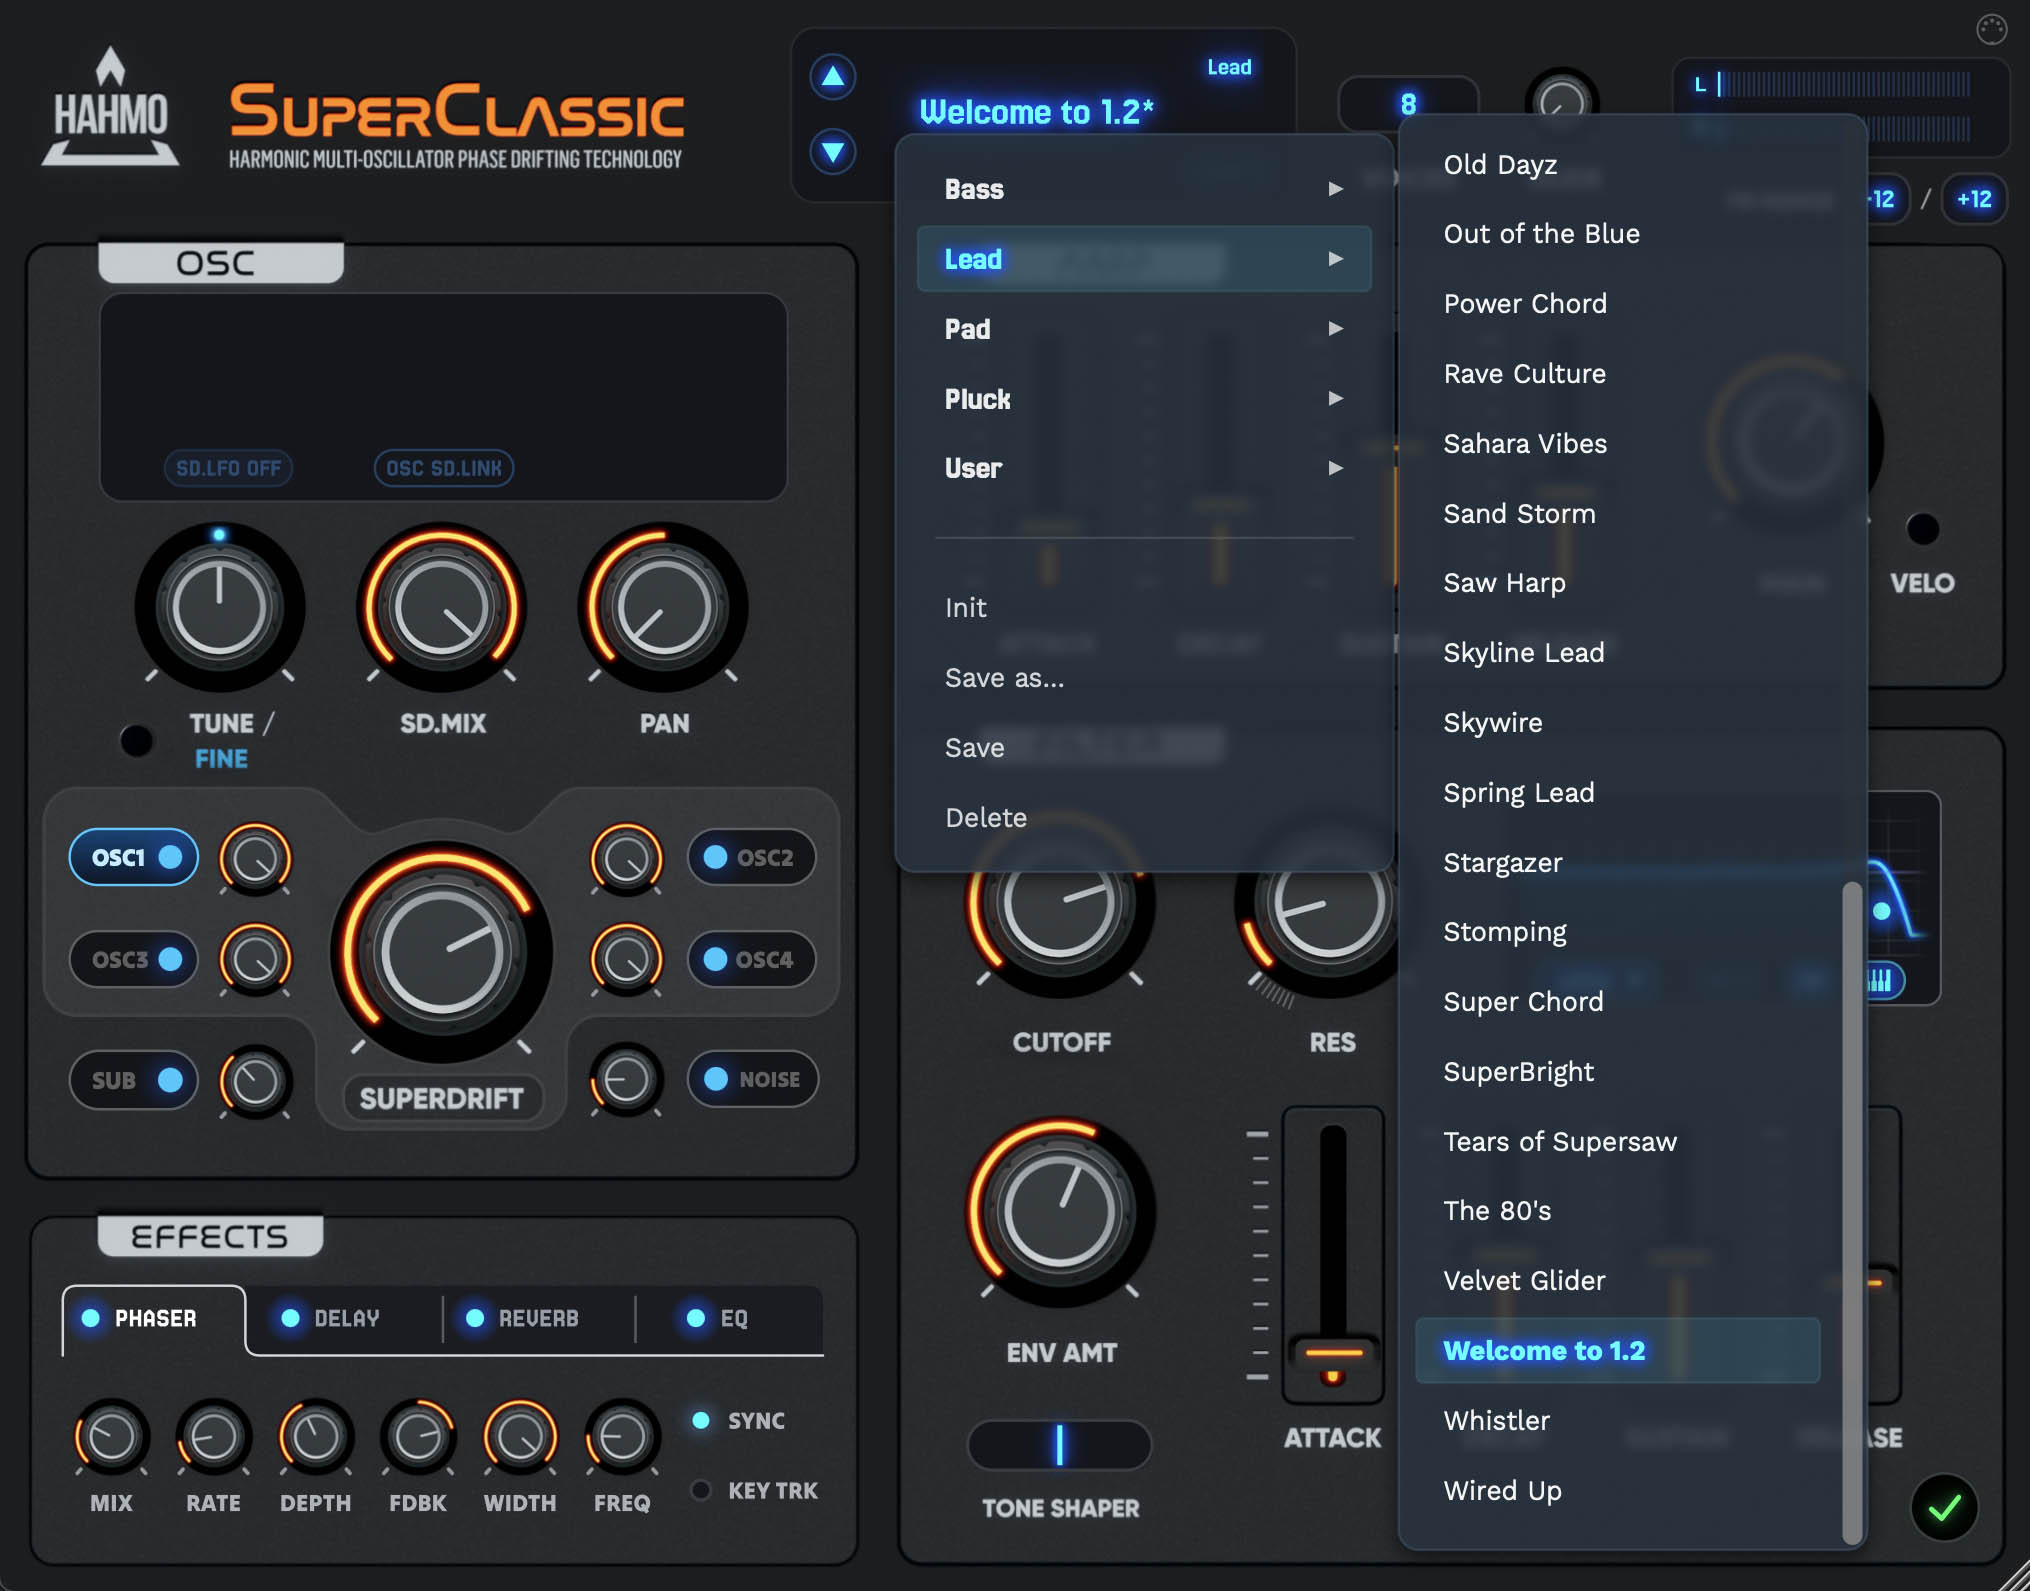
Loading a Preset
- Click the preset name to open the menu.
- Hover over a category to reveal its presets in a submenu.
- Click a preset to load it.
The currently loaded preset — and the category it lives in — are highlighted in the menu, so you always know which sound you're starting from.
Creating a New Sound
Choose Init from the preset menu to reset SuperClassic to a clean starting point. This is the recommended way to begin a patch from scratch.
Saving Changes
Choose Save As to save your sound under a new name and category, or Save to overwrite the current preset. Your own presets live alongside the factory content and appear in the same menu. To remove a preset you no longer need, load it and choose Delete — SuperClassic then moves on to the next preset in the list.
Factory presets are installed together with the plug-in. If SuperClassic can't find them at startup, it will let you know and point you to a fresh installer — this usually means the installation was moved or partially removed.
Using MIDI Learn
You can control almost any knob or button in SuperClassic from the knobs and faders on your MIDI controller.
To assign a control:
- Right-click the knob, slider, or button you want to control. A menu appears showing the parameter's name and its current CC assignment, if any.
- Choose MIDI Learn. The control starts blinking, and SuperClassic listens for incoming MIDI.
- Move a knob or fader on your MIDI controller. The first CC message received is assigned to the parameter, and the center display confirms the new binding.
To remove an assignment, right-click the control and choose Clear MIDI CC.
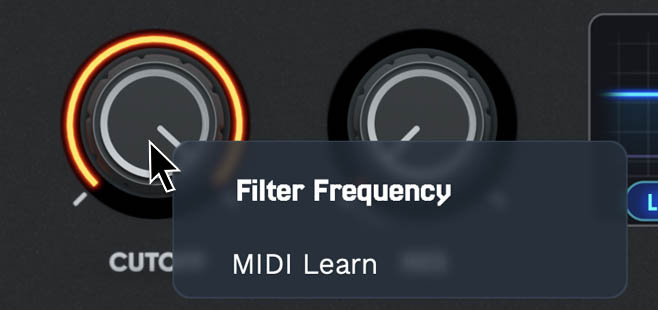
Learn mode times out after 10 seconds if no CC arrives, so an accidental right-click never leaves SuperClassic waiting forever. Your CC mappings are saved with the DAW project.
The MIDI Mappings Window
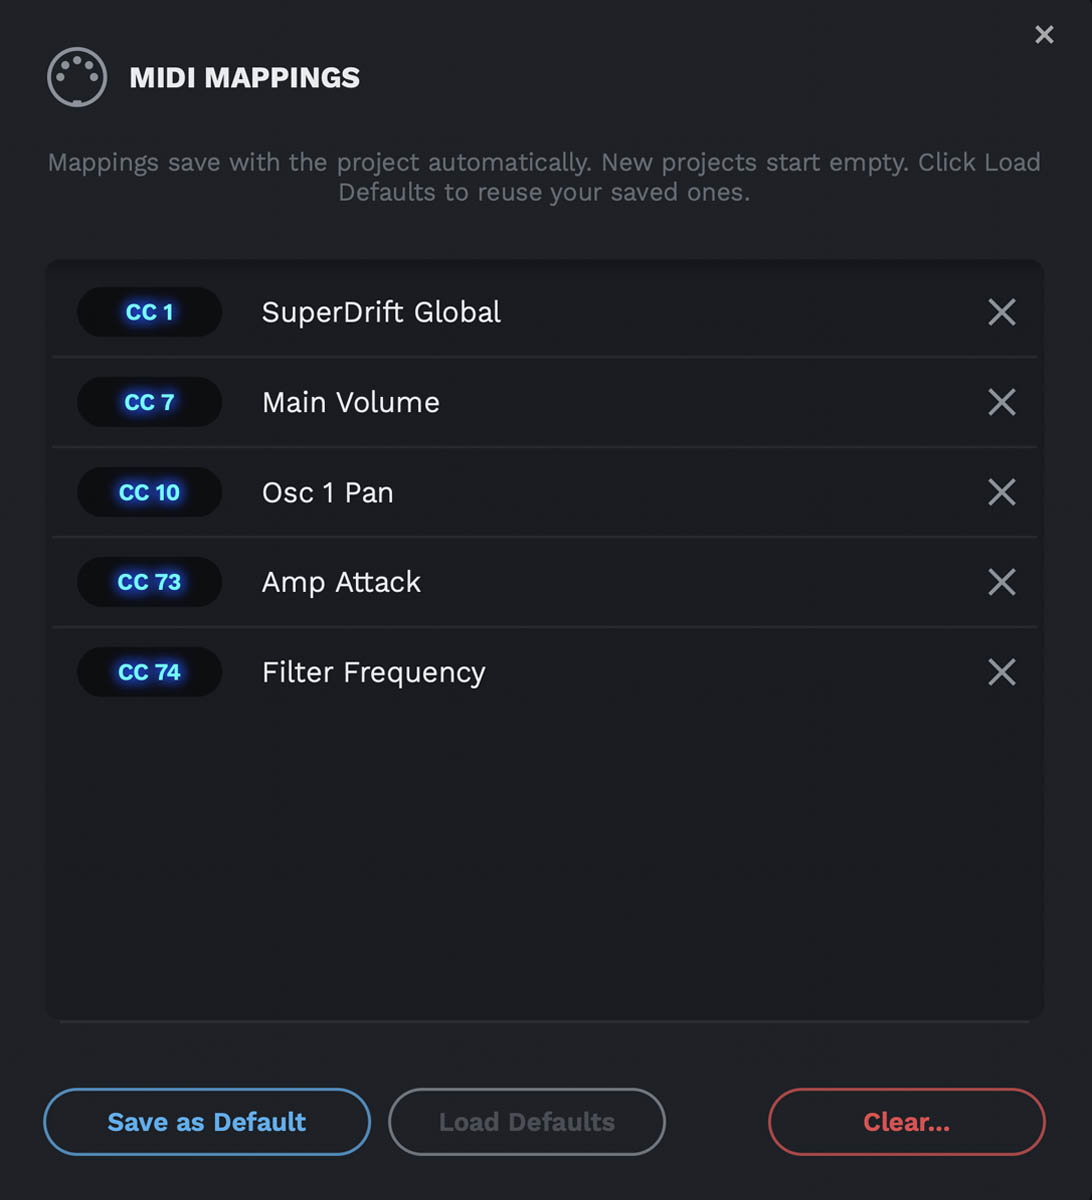
To see all of your assignments in one place, click the MIDI connector icon in the top-right corner of the interface.
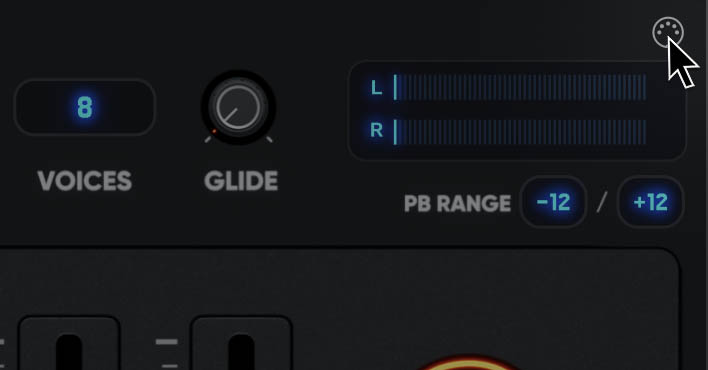
The MIDI Mappings window lists every current CC assignment; click the (x) next to an entry to remove that mapping. The list updates live as you learn new assignments. When you're done, close the window with the X in its top-right corner (clicking anywhere outside the window works too).
Mappings save with the project automatically, and every new project starts empty — SuperClassic never carries mappings over on its own. Load Defaults is the only way saved defaults enter a project.
Three buttons at the bottom of the window manage your setup:
- Save as Default — saves the current mappings to a shared defaults file you can reuse in any project with Load Defaults. Grayed out when the project has no mappings, so an empty project can't blank a saved default by accident. If a saved default already exists, SuperClassic asks before overwriting it.
- Load Defaults — replaces this project's mappings with your saved defaults. Grayed out if you haven't saved any. If the project already has mappings, SuperClassic asks first, since loading will discard them.
- Clear... — opens a confirmation with two independent checkboxes: the mappings used in this project, and the saved defaults on disk (shown with their count). Check whichever you want gone and click Clear; a checkbox is grayed out if there's nothing of that kind to clear.
CHAPTER 3The SuperClassic Oscillators
What is a Supersaw?
In 1996, Roland's JP-8000 introduced a waveform that went on to define a whole era of dance music. Instead of playing a single sawtooth, the supersaw played seven of them at once: one at the pitch of the note, and six more tuned slightly above and below it. Because the seven waves never quite line up, the sound is in constant, gentle motion. That shimmer is what makes a supersaw feel alive in a way a single oscillator never does.
There was more to it than just stacking saws, though. Roland tuned the six side oscillators to a very particular set of pitch relationships, and the spread doesn't grow evenly as you turn up the detune: it follows a carefully shaped curve of its own. Much of the supersaw's character lives in those details, and SuperClassic replicates them faithfully.
Each of SuperClassic's four oscillators (we call them parts) is a complete seven-saw stack, generated from band-limited saw waves that stay clean and alias-free all the way up the keyboard. With all four parts running, every key you press sets 28 oscillators in motion.
The Four Parts
The four parts are selected with the OSC 1–OSC 4 pill buttons. Click a pill to select that part for editing — the knobs in the oscillator section always show the currently selected part. Click a pill's power LED to turn the part on or off.
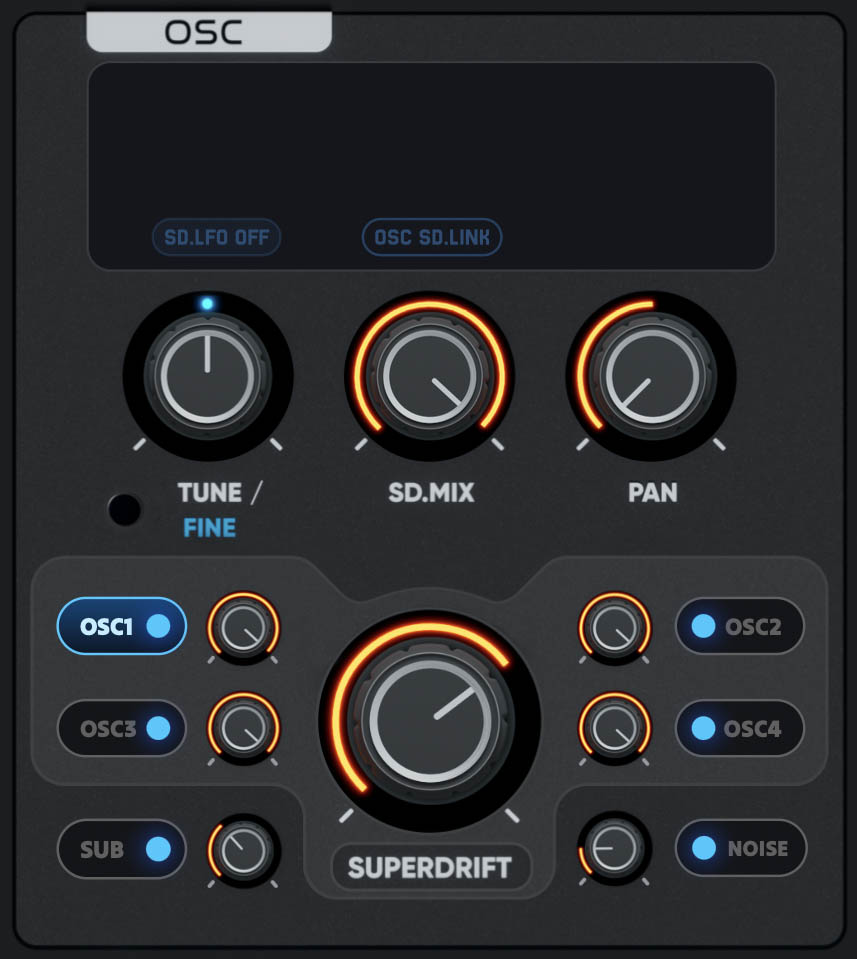
Each part has the following controls:
| Control | Description |
|---|---|
| VOLUME | The part's level in the mix. |
| PAN | The part's position in the stereo field. Try panning two detuned parts apart for enormous width. |
| TUNE | Transposes the part by up to ±24 semitones. Classic moves: one part an octave down for weight, or +7 semitones for a fifth. |
| FINE | Switches the tune control to fine mode, adjusting the part in cents (±63). Slight fine offsets between parts thicken the stack even further. |
| SUPERDRIFT | The part's detune and drift amount — see below. |
| SD.MIX | The balance between the center oscillator and the six detuned side oscillators — see below. |
SuperDrift™
SuperDrift is SuperClassic's proprietary drift engine, and the key ingredient behind its analog-style width and warmth.
In a classic supersaw, the side oscillators are detuned by fixed amounts. SuperDrift goes further: every oscillator in the stack gets its own independent LFO, and the LFO rates are spaced using golden-ratio frequency offsets. Because the ratios are irrational, the drift pattern never repeats — each note breathes and moves like a well-worn analog polysynth, not a loop.
Use the SUPERDRIFT knob to set how far the stack spreads. One sweep of the knob raises the classic detune amount and the depth of the drift LFOs together — from a barely-touched, chorus-like shimmer at low settings to full-blown movement at the top.
SD.MIX
Use the SD.MIX knob to balance the center oscillator against the detuned side oscillators. Low settings emphasize the center: tighter, more focused, closer to a plain saw. High settings emphasize the sides: wider and lusher. You can think of it as a dry/wet control for the supersaw effect itself.
SD.LFO
The SD.LFO switch steps the drift modulation through four stages:
| Setting | Description |
|---|---|
| OFF | No drift modulation. The stack is statically detuned — the classic, unmodulated supersaw. |
| LOW | Subtle shimmer. Adds gentle life without changing the character. |
| MID | The sweet spot for most patches — clearly animated, still controlled. |
| HIGH | Full-blown motion. Big, swirling pads and cinematic textures. |
SD.LINK
Enable SD.LINK to link the SuperDrift and SD.MIX controls across all four parts. With the link active (shown by an animated dashed border around the OSC pills), one turn of either knob moves all four parts together — perfect for performing sweeps over the whole stack, or assigning a single MIDI controller knob to the entire supersaw character.
ToneShaper™
One of the defining elements of the original supersaw sound is a resonant highpass filter that tracks the keyboard, sitting just above the played note. It thins out the low end of the stack and adds a glassy emphasis right at the fundamental — that unmistakable JP-8000 sheen.
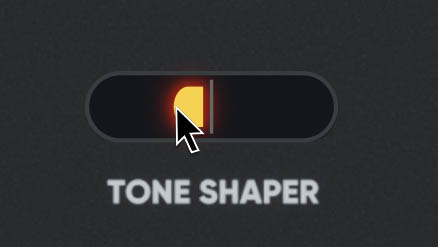
The TONESHAPER slider opens up this signature filter:
- At 0 (center), you get the classic voicing — the authentic supersaw character.
- Negative values pull the filter down and soften its resonance, letting more low end through for a rounder, fuller stack. At −100 the filter is essentially out of the way.
- Positive values push the filter up above the note, thinning the sound further and sharpening that resonant edge — great for cutting leads and airy top layers.
ToneShaper affects only the four SuperClassic parts — the noise and sub oscillators are left untouched. It is applied inside the supersaw engine, before the main filter, so you can thin out the supersaw stack while the sub keeps its full low-end weight, and still sweep the main filter over everything.
CHAPTER 4Noise and Sub Oscillators
New in 1.2, SuperClassic adds two dedicated oscillators alongside the four supersaw parts: a noise oscillator and a sub oscillator. Select them with their own pills next to OSC 1–OSC 4, and toggle them on and off the same way.
The Noise Oscillator
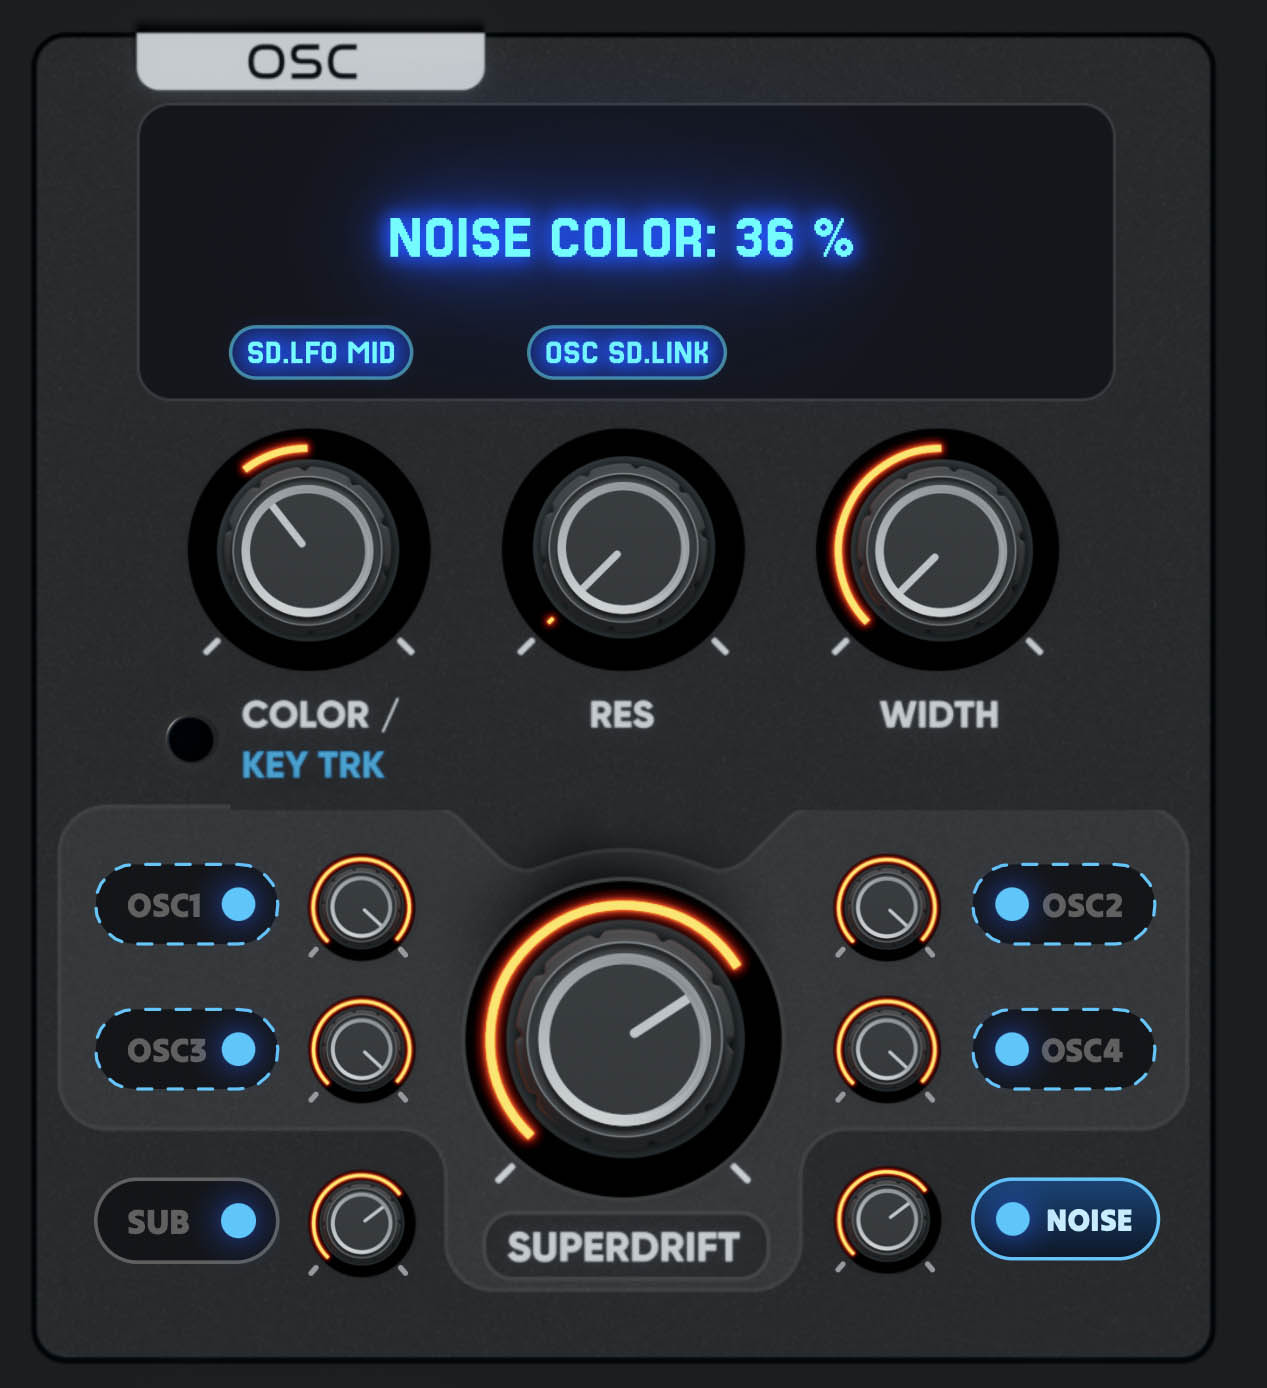
The noise oscillator runs from a soft, dark bed of noise to aggressive top-end — ideal for adding air to pads, attack to plucks, or grit to basses.
| Control | Description |
|---|---|
| VOLUME | The noise level in the mix. |
| COLOR | The tonal balance of the noise. Low settings give dark, filtered rumble; the center is neutral; high settings emphasize bright top-end hiss. |
| RES | Adds a resonant peak to the noise filter. As you raise it, the noise develops an increasingly focused, whistling tone at the filter frequency. At maximum it approaches a pure, self-oscillation-like ring. |
| WIDTH | Stereo width of the noise, from mono (identical left and right) to fully decorrelated wide stereo. |
| KEYTRACK | Makes the noise filter follow the notes you play. |
Crank RES to the max and enable KEYTRACK — the resonant peak now follows the keyboard, turning the noise oscillator pitched and playable. Layer it quietly under the supersaws for a breathy, organic edge.
The Sub Oscillator
The sub oscillator adds instant low-end weight one octave below the played note — the foundation for even more massive leads and basses.
| Control | Description |
|---|---|
| VOLUME | The sub level in the mix. |
| TUNE | Transposes the sub by up to ±24 semitones from its one-octave-down base. Set it to +12 to bring it up to the played pitch, or −12 for two octaves down. |
| FINE | Switches the tune control to fine mode, adjusting the sub in cents (±63). |
| SHAPE | Morphs the waveform continuously from a round sine, through triangle and saw, to a hard-edged square. The knob snaps lightly at each pure shape, and the center display draws the waveform as you turn, naming it (SINE, TRI, SAW, SQR) when you land on one. Low settings give pure weight; higher settings add harmonics. |
| PAN | Position of the sub in the stereo field. For bass duty, keep it centered. |
The sub is phase-locked to the first part's center oscillator, so at unison and octave settings the two always reinforce each other — the low end stays solid and consistent from note to note instead of varying with random phase.
CHAPTER 5The Filter
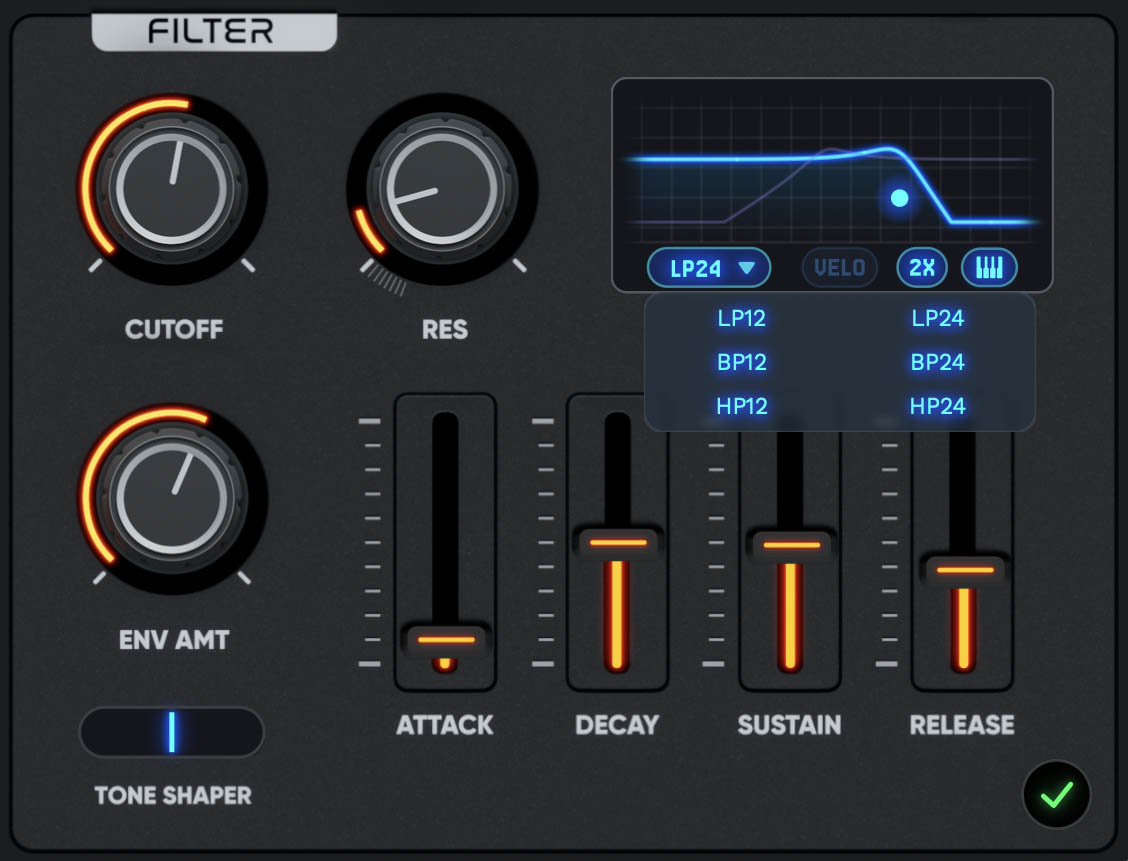
SuperClassic's filter section is a classic virtual-analog design with accurate resonance mapping, modeled on the response of the hardware that made these sounds famous. All oscillators — the four supersaw parts, noise, and sub — run through it.
Filter Types
Use the filter type selector to choose one of six classic modes:
| Type | Description |
|---|---|
| LP12 | Lowpass, 12 dB/octave. Gentle slope — bright, open, and forgiving. The go-to for supersaw leads and pads. |
| LP24 | Lowpass, 24 dB/octave. Steeper slope for darker, more dramatic sweeps and rounder basses. |
| BP12 | Bandpass, 12 dB/octave. Removes both lows and highs — great for thinner textures that sit in a busy mix. |
| BP24 | Bandpass, 24 dB/octave. A narrower, more focused band. |
| HP12 | Highpass, 12 dB/octave. Removes low end — instant top-layer material. |
| HP24 | Highpass, 24 dB/octave. Steeper low-end removal. |
Setting Filter Parameters
Cutoff
Use the CUTOFF knob to set the filter's corner frequency. This is the knob you'll automate most — supersaw music practically runs on filter sweeps.
Resonance
Use the RES knob to emphasize frequencies around the cutoff point. SuperClassic's resonance mapping is modeled on the original hardware — and true to the JP-8000, it runs slightly hot at zero, giving the filter a present, slightly peaked character by default.
New in 1.2, you can also dial resonance negative: below zero, the peak flattens out into a smooth Butterworth curve — the cleanest, most neutral response the filter can produce. Use it when you want the filter to disappear into the mix.
Key Track
Enable KEYTRACK to make the cutoff follow the keyboard, keeping the filter's character musical and consistent from the lowest bass note to the highest lead line.
Filter Envelope Amount
Use the ENV amount knob to set how strongly the filter envelope opens the cutoff. See The Envelopes for the envelope itself.
Filter Quality
The QUALITY switch selects the filter's oversampling factor: 1X, 2X, or 4X. Higher settings keep the resonant highs cleaner and more alias-free at the cost of some CPU. 2X is a great default; switch to 4X for final renders of bright, high-resonance patches.
The Live Visualizer
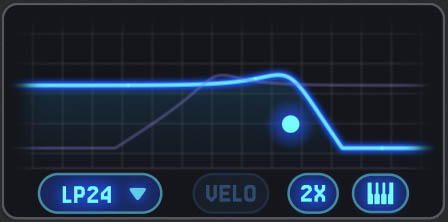
The filter section includes a live response visualizer — you see the actual filter curve, in real time, exactly as it's applied to the sound. Every sweep, every envelope hit, every bit of key tracking shows up on screen as it happens. The curve's handle follows the envelope-adjusted cutoff, so what you see is always what you hear.
CHAPTER 6The Envelopes
SuperClassic has two carefully modeled, snappy ADSR envelopes: one for the amplifier and one for the filter.
The Amp Envelope
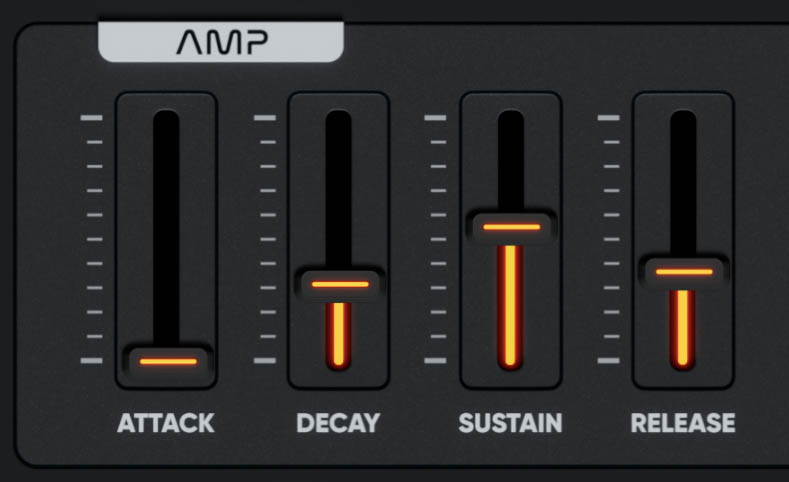
The amp envelope shapes the volume of every note:
| Stage | Description |
|---|---|
| A (Attack) | How long the sound takes to reach full level after a key is pressed — from instant (plucks, stabs) up to 25 seconds (slow pads). |
| D (Decay) | How long the sound takes to fall from the attack peak to the sustain level. |
| S (Sustain) | The level held for as long as the key stays down. |
| R (Release) | How long the sound takes to fade out after the key is released — up to 55 seconds for endless washes. |
The Filter Envelope
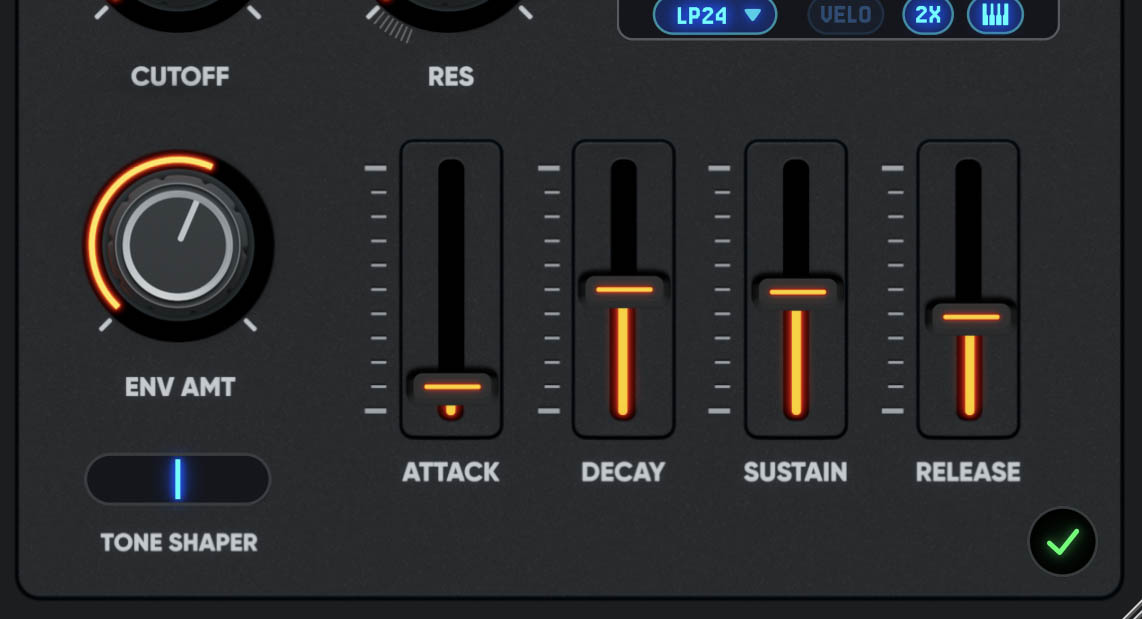
The filter envelope works the same way, but drives the filter cutoff instead of the volume. Its strength is set by the ENV amount knob in the filter section. A fast attack and medium decay with a low sustain gives the classic plucky filter "spike"; slow attack settings make pads bloom open over time.
Velocity
Two velocity switches control how hard playing affects the sound:
- VELO → AMP — when enabled, playing harder makes notes louder.
- VELO → FILTER — when enabled, playing harder opens the filter further, making hard notes brighter as well as louder. Great for expressive plucks and keys.
CHAPTER 7Voicing and Glide
Voices
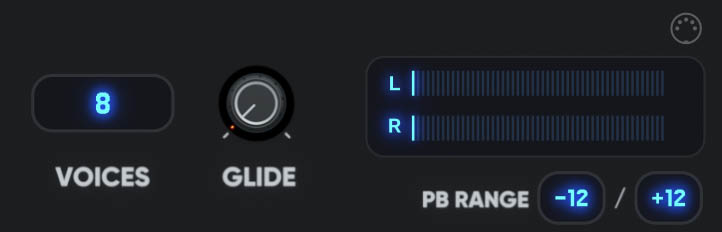
The VOICES selector sets SuperClassic's polyphony, from 1 to 32 voices. Remember that each voice can be running up to 28 supersaw oscillators plus noise and sub — a pad using 4 stacked parts and 32 voices can be demanding even on powerful machines. Use the lowest polyphony that fits the part: 8 voices is plenty for most leads and plucks.
Setting VOICES to 1 turns SuperClassic monophonic — combined with glide, this is the classic mono-lead setup.
Glide
Use the GLIDE knob to make the pitch slide smoothly from one note to the next, over up to 10 seconds. Glide is a monophonic performance feature: it's active when VOICES is set to 1 and LEGATO is on. Play connected, overlapping notes and the pitch slides from one to the next; play detached and each note starts in tune. Subtle settings add a vocal quality to leads; extreme settings are an effect in themselves.
Legato
With LEGATO enabled, a held line flows through one voice without retriggering the envelopes on every note — the classic way to phrase mono leads and basses. Legato also enables glide between overlapping notes, as described above.
Pitch Bend Range
The bend range selectors set how far your controller's pitch wheel bends the pitch — down and up are set independently, each up to ±24 semitones. The default is ±2 semitones. Click and drag a number up or down to change it.
CHAPTER 8The Effects Rack
New in 1.2, SuperClassic includes a built-in effects rack with six effect types: Delay, Reverb, Chorus, Phaser, Drive, and EQ. Every effect was tuned on this synth, for this synth — voiced to carry lush supersaws rather than to be a generic multi-effect.
Working with Effect Slots
The rack has four slots, shown as a row of chips. The slot order is the processing order — audio flows through the chips from left to right.
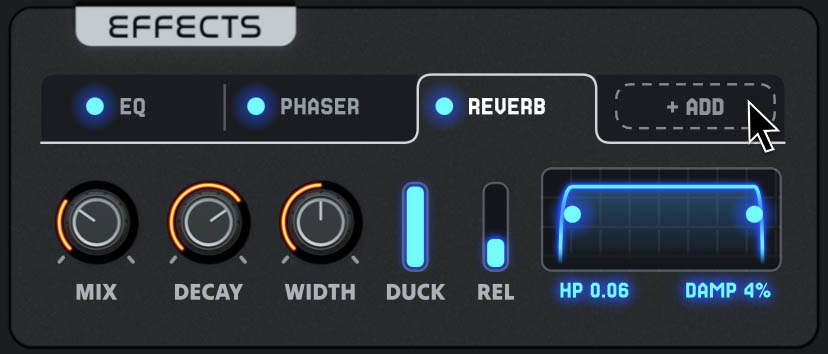
- To add an effect, click an empty slot and choose an effect type. The new effect is switched on right away, so you hear it immediately.
- To edit an effect, click its chip. The effect's controls appear in the panel below.
- To swap an effect for another, click the selected chip again and choose a replacement — it takes over the same slot position.
- To reorder effects, drag a chip to a new position.
- To bypass an effect, click the LED on its chip. The effect stays in place with its settings intact.
- To remove an effect, hover over its chip and click the (x) that appears.
Each effect type can be used once in the rack. All effects are global (shared by all voices) and sit after the synth engine, just before the master output. Removing or replacing an effect resets its settings to defaults — if you want to keep your settings for later, bypass the effect with its LED instead.
Delay
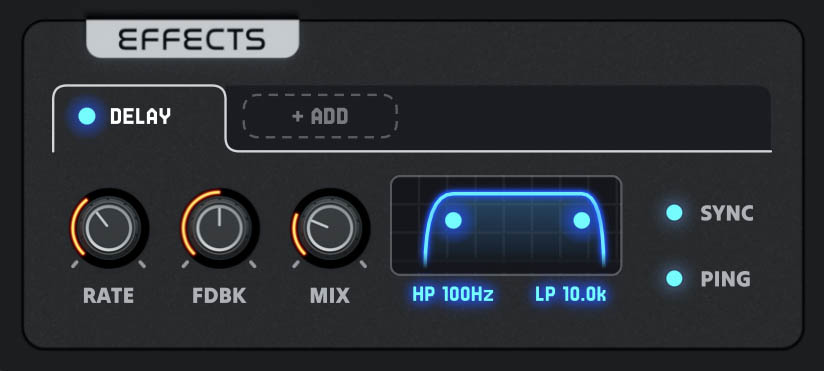
A stereo delay with tempo sync, ping-pong mode, and filters in the feedback path.
| Control | Description |
|---|---|
| MIX | The balance between the dry signal and the delay repeats. |
| FB | Feedback — how much of each repeat is fed back in. Higher settings give longer repeat tails. |
| RATE | The delay time. With SYNC off, this is a free time in milliseconds (up to 1000 ms). With SYNC on, the delay locks to your host tempo and the knob selects a note division. |
| SYNC | Locks the delay time to the host tempo. Divisions run from 1/32 to 1/2, including triplet (T) and dotted (D) variants. |
| PING-PONG | Bounces the repeats alternately left and right for an extra-wide echo. |
| HP / LP | Highpass and lowpass filters on the delayed signal — drag the two handles on the filter display to set them. Roll off lows to keep repeats from muddying the mix, and highs for a darker, tape-style tail. |
The classic trance setup: SYNC on, a dotted 1/8 division, moderate feedback, and the highpass raised until the repeats sit behind the lead instead of on top of it.
Reverb
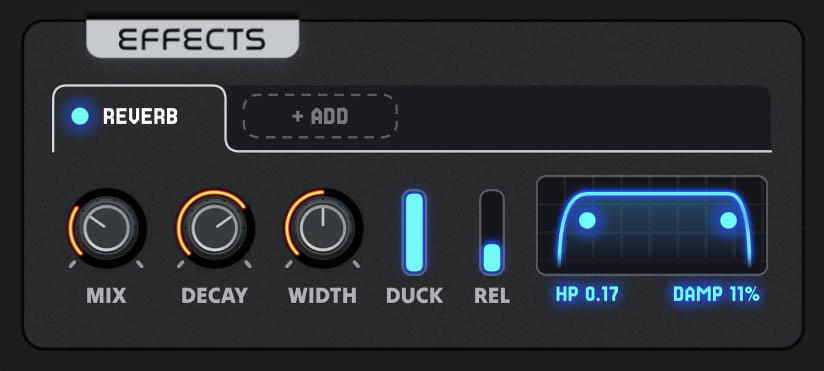
Not just another built-in reverb: SuperClassic's reverb was voiced specifically to carry supersaw pads and leads — dense, wide, and smooth, with no metallic ring.
| Control | Description |
|---|---|
| MIX | The balance between the dry signal and the reverb. |
| DECAY | How long the reverb tail rings out — from tight rooms to near-endless washes. |
| WIDTH | The stereo width of the reverb, from mono to wider-than-the-source. |
| DUCK | Note-triggered ducking. While you play, the reverb steps back; in the gaps between notes, it blooms. This keeps even a huge, wet reverb from washing out the mix. |
| REL | How quickly the reverb blooms back after a note — short for rhythmic pumping, long for gentle swells. |
The REVERB TONE display shapes the tail's tonal character. Drag the left handle (HP) to roll low end out of the reverb, keeping the tail from clouding your bass; drag the right handle (DAMP) to darken the tail, from bright and airy to warm and muted.
Chorus
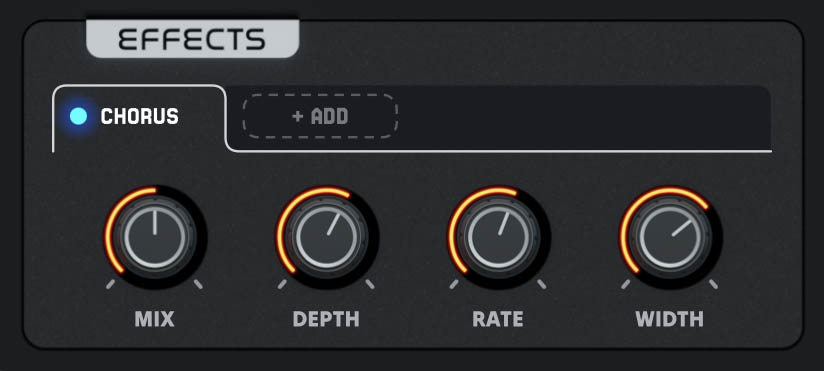
A classic analog-style chorus modeled on bucket-brigade (BBD) hardware. Slow movement, extra width, instant warmth — sometimes that's all a patch needs.
| Control | Description |
|---|---|
| MIX | The balance between the dry and chorused signal. |
| DEPTH | How far the chorus modulates the delay — from subtle thickening to seasick wobble. |
| RATE | The speed of the chorus movement, from a very slow 0.05 Hz drift to 12 Hz vibrato territory. |
| WIDTH | The stereo spread of the chorus voices. |
Phaser
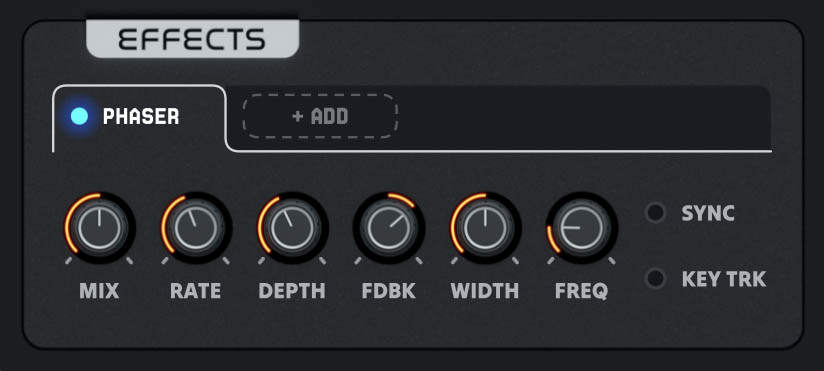
A virtual-analog phaser with twelve staggered stages and a quadrature stereo LFO — deep, liquid sweeps rather than thin whooshes.
| Control | Description |
|---|---|
| MIX | The balance between the dry and phased signal. |
| RATE | The sweep speed. With SYNC on, the phaser locks to your host tempo with divisions from a slow 4-bar sweep (4/1) down to 1/32T. |
| DEPTH | How far the sweep travels around the center frequency. |
| FB | Feedback around the phaser stages. Positive and negative values give differently voiced notches; extreme settings turn strongly resonant. |
| WIDTH | Stereo width of the sweep — at full width, the left and right channels sweep in quadrature for a rotating, three-dimensional motion. |
| CENTER | The center frequency the sweep orbits, from 60 Hz to 5 kHz. |
| KEYTRACK | Makes the sweep center follow the notes you play, keeping the phaser's character consistent across the keyboard. |
Drive
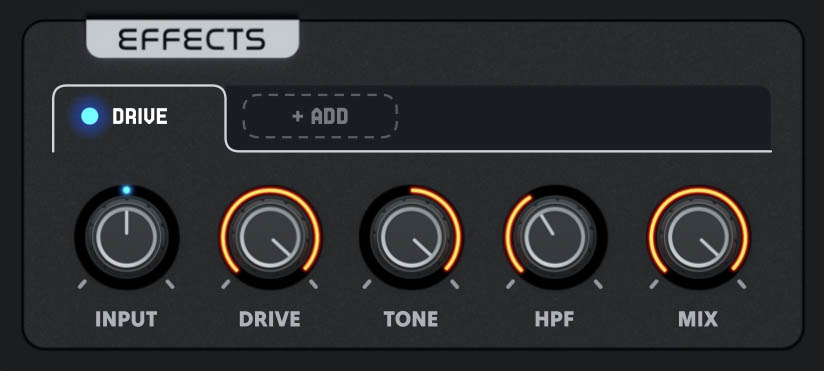
A two-stage saturation chain — a preamp "crunch" stage cascading into a shaper. A touch adds analog warmth and glue; crank it and you're in 303 territory, with filthy, resonant leads and basses.
| Control | Description |
|---|---|
| DRIVE | How hard the signal hits the saturation stages. |
| INPUT | Trims the signal going into the saturation stages by ±18 dB. Turn it down to keep the signal below the distortion's knee for subtle warmth at any Drive setting; turn it up to push quiet material into extra grit. At 0 dB it has no effect. |
| TONE | Tilts the character from dark and smooth to bright and aggressive. |
| HPF | A highpass into the distortion stage (20 Hz – 1 kHz). Raising it keeps the low end clean and tight while the mids and highs saturate — essential for driven basses. |
| MIX | Parallel blend between the clean and driven signal. |
Equalizer
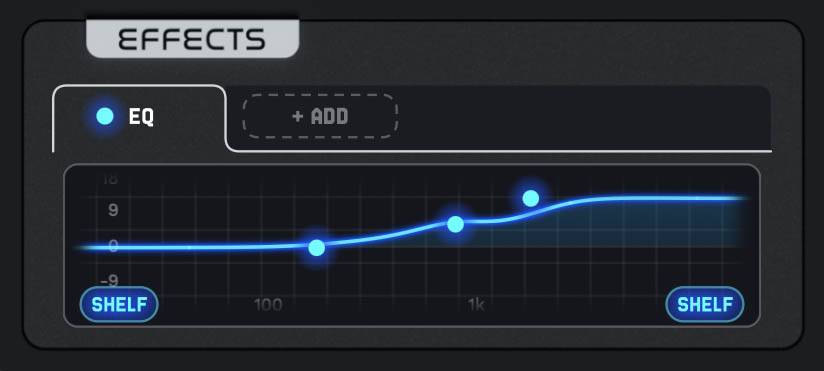
A full three-band EQ with an interactive curve display — shape the patch right inside the synth instead of reaching for a channel EQ.
Drag a band's handle directly on the display to set its frequency and gain; a readout shows the exact values as you drag.
To adjust a band's Q (bandwidth), hover over its handle and scroll with the mouse wheel — no click needed. The curve and readout follow as you scroll, so you can see and hear the band narrow or widen in real time.
| Band | Modes | Range |
|---|---|---|
| LOW | Highpass, Peak, or Shelf | 20 Hz – 2 kHz, ±18 dB |
| MID | Peak | 100 Hz – 8 kHz, ±18 dB |
| HIGH | Lowpass, Peak, or Shelf | 1 kHz – 20 kHz, ±18 dB |
When the low band is set to Highpass mode (or the high band to Lowpass), scrolling on its handle adjusts the slope instead, continuously from 12 to 48 dB/octave — the rolloff steepens smoothly as you scroll, with no clicks or steps.
The EQ replaces the fixed bass and treble knobs from earlier versions. Presets made before 1.2 load exactly as saved — the old tone settings are translated automatically. Existing DAW automation on the old bass and treble parameters keeps working too: those lanes now drive the EQ's low and high band gains (the parameters appear in your host marked "deprecated").
CHAPTER 9The Master Section
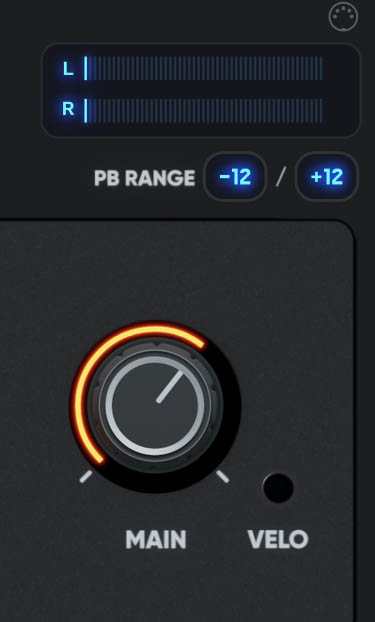
Main Volume
Use the MAIN knob to set SuperClassic's output level. The stereo meters show your output level on both channels; if they run into the red, back the volume off.
The Output Limiter
A transparent limiter sits at the very end of SuperClassic's signal path as a safety net. With sensible levels it does nothing at all; when a resonant filter sweep or a stack of 32 voices spikes, it catches the peak instead of letting it clip your master bus.
The Oscilloscope
The center display's oscilloscope shows the final output waveform in real time — watch the SuperDrift movement, the filter's bite, and the effects doing their work.
CHAPTER 10Reference
Signal Flow
SuperClassic's signal path, from keys to output:
- Oscillators — four SuperClassic supersaw parts (each with ToneShaper), noise oscillator, sub oscillator, mixed per voice.
- Filter — the main VA filter with its envelope, key tracking, and oversampling.
- Amp envelope — per-voice level shaping; all voices are then summed.
- Effects rack — up to four effects, processed in slot order.
- Master — main volume and the safety limiter.
Tempo Sync Divisions
| Effect | Available divisions |
|---|---|
| Delay | 1/32, 1/32T, 1/16, 1/16T, 1/16D, 1/8, 1/8T, 1/8D, 1/4, 1/4T, 1/4D, 1/2 |
| Phaser | 4/1, 3/1, 2/1, 1/1, 1/2, 1/4D, 1/4, 1/8D, 1/4T, 1/8, 1/16D, 1/8T, 1/16, 1/16T, 1/32, 1/32T |
T = triplet, D = dotted.
CPU Tips
- Use the lowest VOICES setting that fits the part.
- Turn off parts you're not using — an inactive part costs nothing.
- With SD.MIX at zero, a part's six side oscillators are skipped entirely.
- Filter QUALITY at 4X is best saved for final renders.
Formats
SuperClassic is available as VST3 (Windows & macOS) and Audio Unit (macOS).